


Have you ever wanted to share a resource you have created with the rest of the world so that other developers can utilise it? Or ever wondered how these packages come alive on PyPI?
Today, we are going to deploy a simple python package that I have already created here and be available for everyone.
🔸What is PyPI?
The Python Package Index, abbreviated as PyPI and also known as the Cheese Shop (a reference to the Monty Python's Flying Circus sketch "Cheese Shop"), is the official third-party software repository for Python.
It is analogous to the CPAN repository for Perl and to the CRAN repository for R.
🔸PyPI vs PIP
Pip is the de facto package manager in the Python world. It can install packages from many sources, but PyPI is the primary package source where it's used. When installing packages, pip will first resolve the dependencies, check if they are already installed on the system, and, if not, install them.
Pip is a recursive acronym that can stand for either "Pip Installs Packages" or "Pip Installs Python". Alternatively, pip stands for "preferred installer program".
🔸Pre-Requisites
Before we continue, at least make sure you have these installed;
✔setuptools
pip install setuptools
Easily download, build, install, upgrade, and uninstall Python packages.
Setuptools is a collection of enhancements to the Python distutils that allow developers to more easily build and distribute Python packages, especially ones that have dependencies on other packages.
✔twine
pip install twine
Twine is a utility for publishing Python packages on PyPI.
It provides build system independent uploads of source and binary distribution artefacts for both new and existing projects.
You need to register on PyPi and have an account.
As aforementioned, I created a sample project on GitHub so that it’s easier to demonstrate how to publish your own packages on PyPI.
I have not mentioned wheel, which is a setuptools extension for building wheels that provide the bdist_wheel setuptools command.
You can also pip install wheel if you don't have it.
🔸Set Up & Stracture;
The following files are expected and they will make our installations and uploads successful.
✔ README.md;
It is highly recommended to include a README file where you should outline the basic functionality offered by your package. Additionally, you may also include installation instructions or a usage guide.
✔ LICENSE;
It’s always best to include a license in the package you intend to make widely available.
✔ setup.py;
This file should be placed in the top-level directory of your project structure. In this file, you can specify configurations for your Python project.
For example mine;
import pathlib
from setuptools import setup

# The directory containing this file
HERE = pathlib.Path(__file__).parent

# The text of the README file
README = (HERE / "README.md").read_text()

# This call to setup() does all the work
setup(
    name="urlToHTML",
    version="1.0.0",
    description="Auto save HTML files from URLs for Offline Viewing",
    long_description=README,
    long_description_content_type="text/markdown",
    keywords='HTML URLS Save Chrome Offline',
    url="https://github.com/Ronlin1/urlToHTML",
    author="Ronnie Atuhaire",
    author_email="ronlinx6@gmail.com",
    license="MIT",
    install_requires=[
          'requests',
      ],
    classifiers=[
        "License :: OSI Approved :: MIT License",
        "Programming Language :: Python :: 3",
        "Programming Language :: Python :: 3.10",
    ],
    packages=["urlToHTML"],
    include_package_data=True,
    package_dir={'/':'urlToHTML'}
)
✔ setup.cfg;
The setup.cfg is an ini file, containing option defaults for setup.py commands.
For example;
[metadata]
description_file=README.md
license_files=LICENSE
✔ src folder;
This contains all our project code. The sample I created basically saves an HTML file from the URL passed locally on the machine. I had initially intended it for my blogs and this is my code in this file;
By convention, Note it is good for the source folder to have the exact name of the main code file or module and I am naming mine to urlToHTML
import requests

class Blog:
    def save(self, url, file):
        try:
            response = requests.get(url, allow_redirects=True)

            with open(file + ".html", 'wb') as output:
                output.write(response.content)
            print("--DONE--")
        except Exception as e:
            print("Error : ",e)
✔ PyPI Upload
Now we just need to publish our package on PyPI so that other users can install it on their local machines.
Note that from our example, the package depends on the requests library and this dependency is explicitly specified in the setup.py file. Therefore, when users install your package using say pip, the specified dependencies will also be installed.
💨 Create the source distribution of the package
Now that our source code is structured and contains all the required files for packaging we can go ahead and create the source distribution.
A source distribution — commonly referred to as sdist — is a distribution that contains the setup.py file along with the source code and data files (as specified in the setup.py and/or setup.cfg)
First upgrade setup tools & wheel;
python -m pip install –-user –-upgrade setuptools wheel
Now you can create the source distribution of the package by running the command given below:
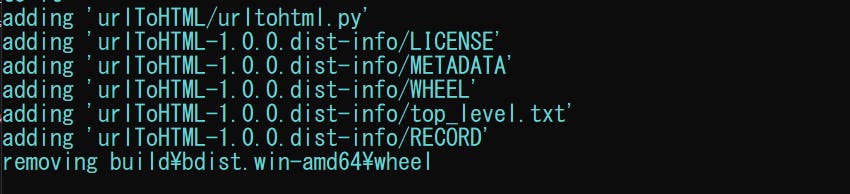
python setup.py sdist bdist_wheel
You will get an output related to this;
This should be the project structure after build up;
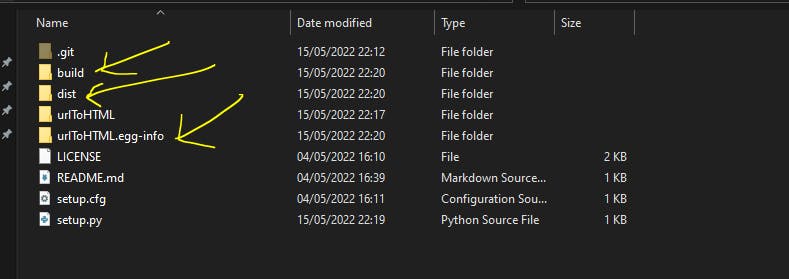
The dist & buildfolders;
The most important folder is the dist folder because it contains the distribution files which will be uploaded to PyPI. It contains the .whl file which is the build distribution and also the source distribution
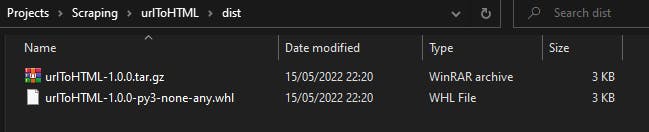
So In the dist folder, you find the bundled app you can distribute.
The build directory is where a package gets unpacked into and build from. When the package is installed successfully, pip removes the unpacked dir from the build directory.

Let's test locally before we push to PyPI by;
pip install -e .
The above command installs the pacage directly from the setup file;
Now if we test 👇, we see everything is good;

Before we do this, let's uninstall that locally installed module;
pip uninstall urlToHTML
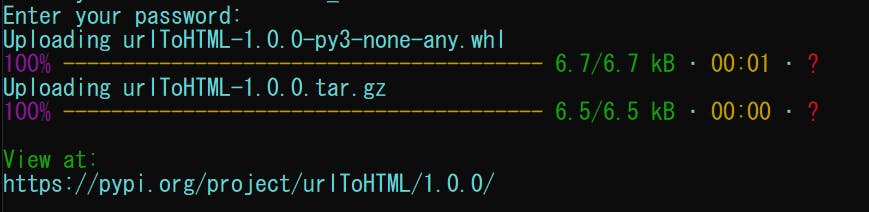
💨 Upload the sdist on PyPI;
py -m twine upload dist/*
Output;
💨 When logged on PyPI, you can view and manage your project;
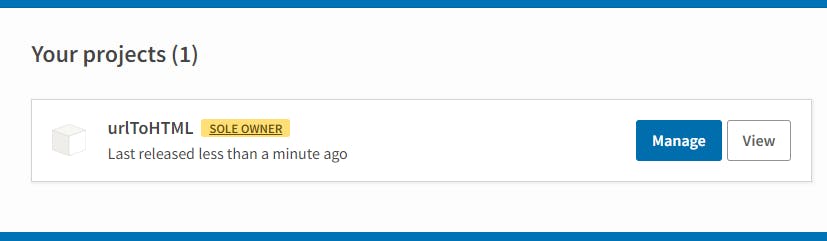
You can also find my live example here🚀🚀

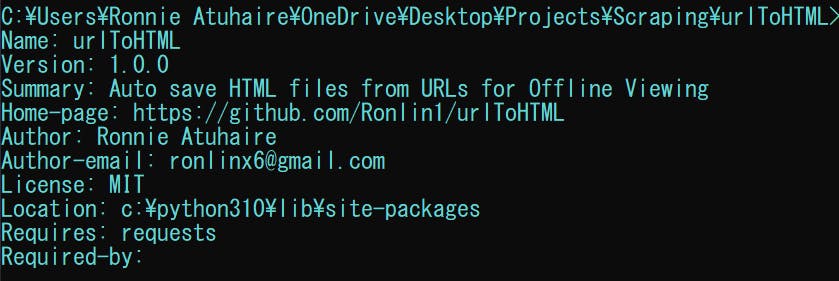
It is alive 🚀🚀...... So, if we did;
pip install urlToHTML and checked with pip show urlToHTML;
Create a test file anywhere(not in the project root) and put this code;
from urlToHTML import urltohtml

initiate = urltohtml.Blog()
save_blog = initiate.save("https://blog.octachart.com/", "test_file")
print(save_blog)
Congrats✨⭐! You did it😍!
It is however recommended to first test on Test PyPI before messing up with the mainnet just like web 3 dapps.
Find the entire code and dist here.
🔸Notes & Resources;
📌 Official PyPI Docs
📌 Licences - GitHub Docs
📌 Test PyPI Official Docs
📌 README - Wikipedia
📌 Test PyPI Repos
🔸 Conclusion
Once again, hope you learned something today from my little closet.
Please consider subscribing or following me for related content, especially about Tech, Python & General Programming.
You can show extra love by buying me a coffee to support this free content and I am also open to partnerships, technical writing roles, collaborations and Python-related training or roles.
 📢 You can also follow me on Twitter : ♥ ♥ Waiting for you! 🙂